
DIY Flamingo Holder
This Flamingo Holder is not only a fun project but also a creative way to add Mexican-inspired charm to your home. Perfect for holding small items like your skincare tubes or brushes.
The Flamingo’s Connection to Mexico
Flamingos are a striking symbol of beauty and adaptability. While most people associate flamingos with tropical landscapes, these elegant birds also have a strong connection to Mexico, particularly the Yucatán Peninsula. Here, flamingos thrive in biosphere reserves like Celestún and Ría Lagartos, where their vivid pink feathers paint a stunning contrast against the turquoise waters.

How to Create a DIY Flamingo Holder
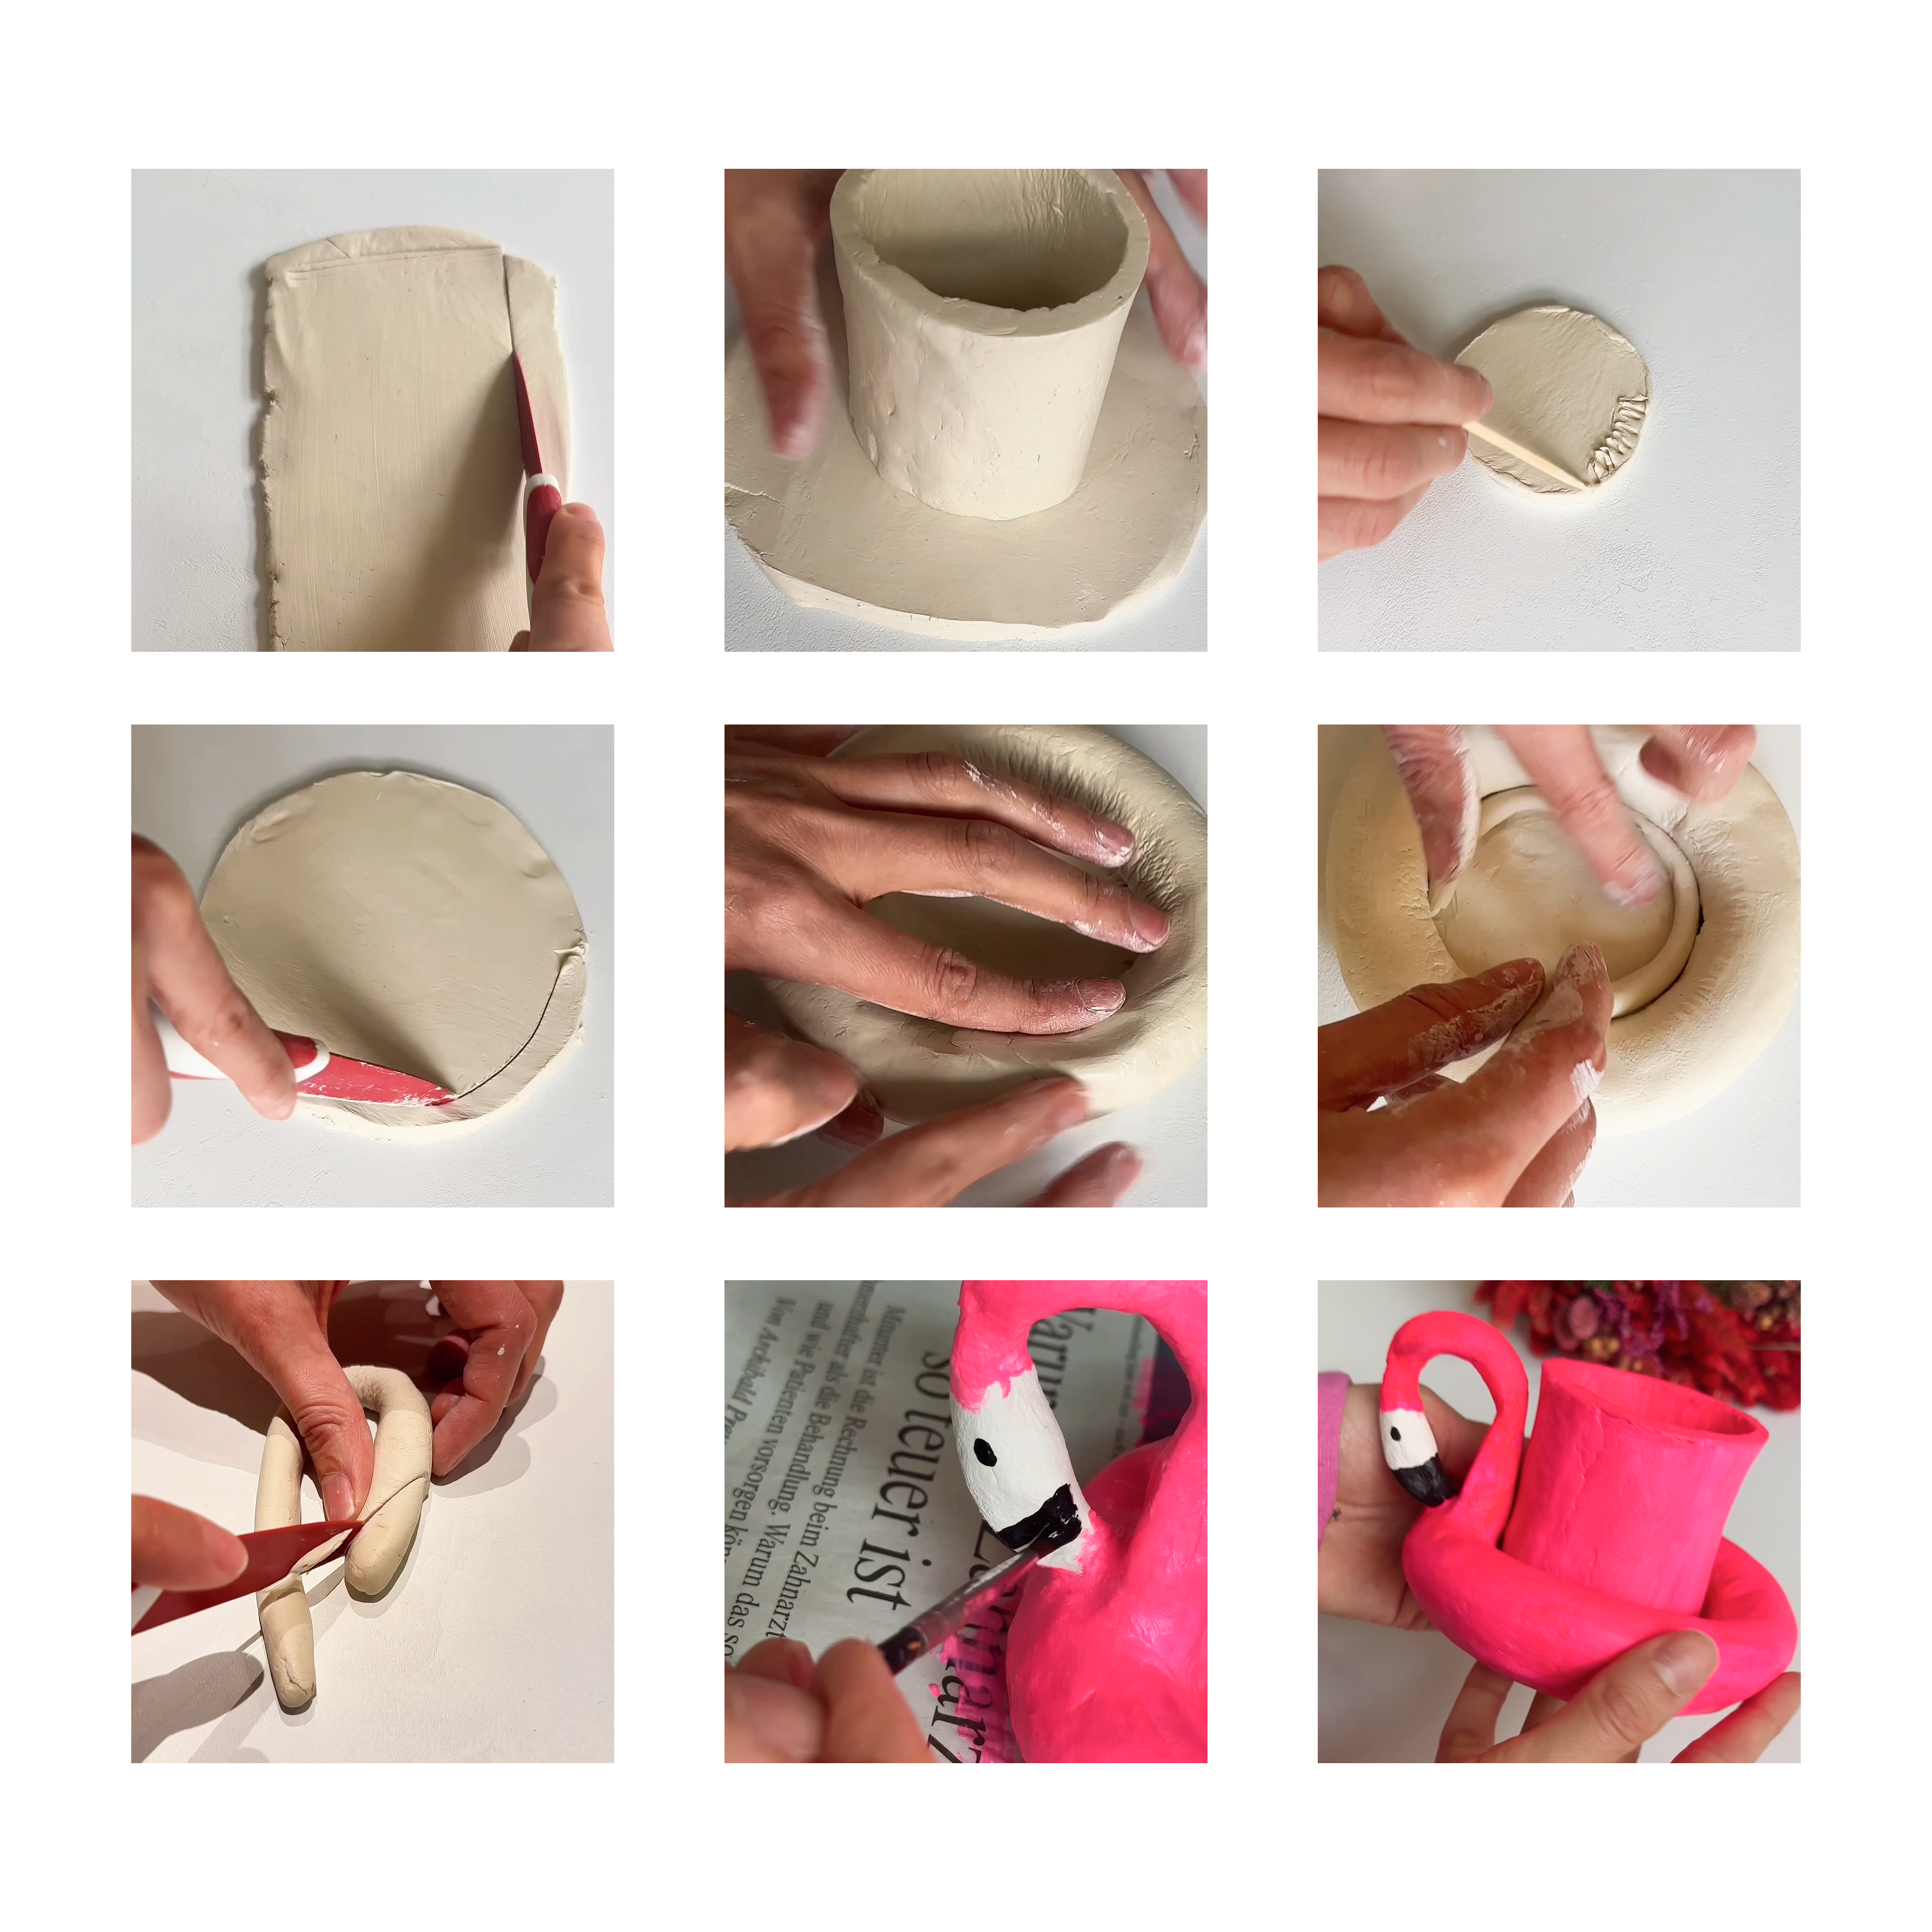
- Assemble the Flamingo: Attach the neck and head to the cylinder, smoothing joints for stability.Roll and Cut the Clay: Roll out air-dry clay into a flat rectangle and cut out a strip for the cylinder.
- Form the Cylinder: Shape the strip into a cylinder and smooth the edges to seal.
- Create the Base: Roll out clay into a circle, cut it to size, and attach it to the bottom of the cylinder.
- Shape the Flamingo Neck: Roll a long, curved piece of clay for the neck and form a small oval for the head.
- Assemble the Flamingo: Attach the neck and head to the cylinder, smoothing joints for stability.
- Refine Details: Smooth rough edges with water and sculpting tools. Let the piece dry completely.
- Paint the Flamingo: Use pink for the body, white for the face, and black for the beak. Add any decorative accents.
- Seal and Finish: Apply a sealant for durability. Your Flamingo Holder is ready to use
What You’ll Need
- Air-dry clay
- Acrylic paints (pink, black, white, and optional accents)
- Clay tools (sculpting knife, rolling pin, and shaping tools)
Validado científicamente
Nuestro cuidado de la piel está respaldado por investigaciones científicas realizadas en México y Alemania.
Armonía con la naturaleza
Elaborados con ingredientes veganos de primera calidad, nuestros productos nunca se prueban en animales.
Filosofía climáticamente neutra
Desde la producción hasta la entrega, toda nuestra cadena de suministro es neutra en CO2 y utiliza ingredientes locales.
Responsabilidad social
Apoyamos a los agricultores locales y brindamos a los jóvenes mexicanos oportunidades para un futuro mejor.
